onn projector manual
Summary
Get the official Onnn projector manual download, setup guide, and troubleshooting tips for easy installation and maintenance.

Welcome to the ONN Projector Manual‚ your comprehensive guide to setting up‚ operating‚ and maintaining your projector. This manual covers everything from initial setup to advanced features‚ ensuring you get the best viewing experience; Learn how to troubleshoot common issues‚ optimize image quality‚ and explore connectivity options for seamless entertainment. Whether you’re a novice or tech-savvy‚ this guide will help you maximize your ONN projector’s potential and enjoy stunning visuals effortlessly.
Overview of the ONN Projector
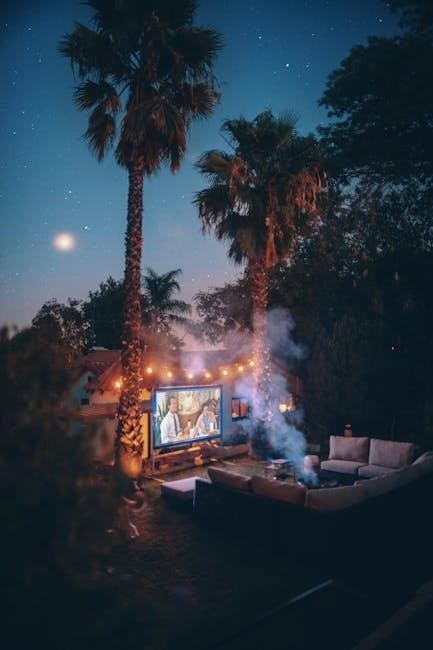
The ONN Projector is a compact‚ versatile device designed for home theaters and outdoor screenings. It supports HD and 4K resolutions‚ offering crisp visuals with adjustable settings like keystone correction and color balance. Equipped with HDMI‚ USB‚ and wireless connectivity options‚ it seamlessly connects to devices. Built-in speakers and Bluetooth enhance audio‚ while its portable design ensures easy setup anywhere‚ making it ideal for both casual and immersive entertainment experiences.
Importance of the User Manual
The user manual is essential for optimizing your ONN Projector experience. It provides step-by-step guides for setup‚ troubleshooting‚ and feature exploration. By understanding the manual‚ you can resolve common issues like no image or sound‚ adjust settings for better quality‚ and unlock advanced features. Regular firmware updates and maintenance tips ensure longevity‚ helping you enjoy uninterrupted entertainment and maximize your projector’s performance effectively;

Setting Up Your ONN Projector
Setting up your ONN Projector is an exciting process that brings your home theater to life. Start by carefully unboxing and installing the projector‚ then connect your devices and configure settings for optimal performance. Follow the manual’s guidance to ensure a smooth and enjoyable setup experience.
Unboxing and Physical Installation
Begin by carefully unboxing your ONN Projector and verifying all included components‚ such as the projector‚ remote‚ HDMI cable‚ and power cord. Place the projector on a stable‚ flat surface or mount it according to your preference‚ ensuring proper ventilation. Handle the lens with care to avoid scratches and fingerprints. Follow the manual’s installation guide for precise alignment and secure placement;
Connecting Devices and Initial Configuration
Connect your ONN Projector to devices using HDMI‚ USB‚ or wireless options. Plug in the HDMI cable from your device to the projector’s HDMI port. Turn on the projector and ensure the lens cover is removed; Use the remote to navigate the menu‚ selecting the correct input source. Adjust display settings like resolution and aspect ratio for optimal viewing. Follow on-screen prompts for wireless connections if applicable.
Troubleshooting Common Issues
Address common issues like no image‚ no sound‚ or remote malfunctions. Check connections‚ restart‚ and ensure settings are correct. Consult the manual for detailed solutions.
Resolving No Image or Sound Problems
If your ONN projector displays no image or sound‚ first ensure all cables are securely connected to the correct ports. Check the power status and verify input settings. Restart the projector and connected devices. If issues persist‚ consult the user manual for troubleshooting steps or perform a factory reset as instructed. This should resolve most connectivity and display problems effectively.
Tackling Connection and Remote Control Issues
Check all cable connections to ensure they are secure and properly plugged in. Verify the input source matches the connected device. For remote issues‚ replace batteries or reprogram the remote as described in the manual. Ensure the IR sensor on the projector is unobstructed. Restart the projector and test the remote functionality again to resolve connectivity and control problems efficiently.
Enhancing Image Quality
Adjust keystone correction and focus for a clear‚ aligned image. Fine-tune color settings‚ brightness‚ and contrast to enhance visual clarity and achieve vibrant visuals effortlessly.
Mastering Keystone Correction and Focus Adjustment
Keystone correction ensures a straight‚ aligned image by adjusting the projector’s angle. Use manual or automatic settings for precise alignment. Focus adjustment sharpens the image for clarity. Position the projector at the same height as the screen and clean the lens regularly for optimal results. Refer to your manual for specific adjustment instructions to achieve the sharpest‚ most vibrant display.
Optimizing Color Settings and Brightness/Contrast
Adjusting color settings‚ brightness‚ and contrast is crucial for achieving vivid visuals. Fine-tune color temperature for natural tones‚ balance contrast for depth‚ and set brightness according to ambient light. Use the manual’s guidance to customize these settings for movies‚ gaming‚ or sports. Regular calibration ensures consistent image quality‚ enhancing your overall viewing experience with precision and clarity.

Using the Remote Control Effectively
Mastering your ONN projector’s remote control is essential for seamless operation. Learn to navigate menus‚ adjust volume‚ and customize settings effortlessly for an enhanced viewing experience.
Understanding Basic Functions and Button Layout
Familiarize yourself with the ONN remote’s basic functions and button layout. The remote typically features power‚ menu‚ volume‚ and navigation buttons. Key buttons include the power button‚ menu button for settings‚ navigation arrows‚ and volume controls. Input/source buttons allow switching between connected devices. The layout is designed for intuitive use‚ ensuring easy access to essential functions during operation.
Programming the Remote for Customized Use
Program your ONN remote to tailor its functions to your needs. Use the code finder tool to input specific device codes‚ ensuring compatibility with your TV‚ soundbar‚ or other devices. Press and hold the SETUP key until the LED blinks twice‚ then enter the four-digit code. This allows seamless control of multiple devices. You can also teach the remote new commands for enhanced customization and convenience.

Exploring Connectivity Options
Explore versatile connectivity options with your ONN projector‚ including HDMI‚ wireless connections‚ and compatibility with laptops‚ smartphones‚ and streaming devices for enhanced entertainment.
Navigating HDMI and Other Wired Connections
Connect your ONN projector to devices via HDMI for high-quality visuals. Ensure proper cable connections between the projector and devices like laptops or gaming consoles. Refer to the manual for specific input options. Turn on the projector‚ remove the lens cover‚ and select the correct HDMI input for optimal display. Adjust settings as needed for the best viewing experience‚ leveraging features like 4K resolution and HDR support if available.
Setting Up Wireless Connections for Convenience
Enable Bluetooth on your ONN projector to wirelessly connect devices like smartphones or tablets. Pair the projector with your device following the manual’s instructions. Ensure stable connections by placing devices close to the projector and avoiding physical obstructions. This setup allows seamless streaming and enhances your entertainment experience with built-in speakers‚ offering a cable-free and user-friendly solution for media playback.
Maintenance and Care Tips
Regularly clean the lens and filter to ensure optimal performance and image clarity. Update firmware to maintain smooth operation and access new features. Keep the projector in a dry‚ dust-free environment to prolong its lifespan and prevent damage.
Cleaning the Lens and Filter for Optimal Performance
Regularly clean the projector’s lens and air filter to maintain clarity and prevent overheating. Use a soft‚ dry microfiber cloth to wipe the lens gently. For the filter‚ remove it and brush off dust or vacuum it lightly. Avoid harsh chemicals or abrasive materials that could damage the surfaces. Ensure all parts are dry before reinstalling to prevent moisture spots or damage.
Updating Firmware and Software Regularly
Regular firmware and software updates are essential for optimizing your ONN projector’s performance. Connect to Wi-Fi or use a USB drive to download the latest updates from the official ONN website. Navigate to the settings menu‚ select “System Update‚” and follow on-screen instructions to ensure a smooth installation. Updates often improve functionality‚ add features‚ and fix bugs‚ keeping your projector running at its best.

Safety Guidelines and Precautions
Ensure your ONN projector operates safely by reading and following all safety guidelines. Avoid water exposure‚ handle with care‚ and maintain proper electrical connections. Ensure good ventilation and avoid overheating to prevent damage and ensure longevity.
Proper Handling and Electrical Safety Measures
Handle your ONN projector with care to avoid damage. Never touch the lens or electrical components with wet hands. Ensure proper ventilation to prevent overheating. Avoid exposure to water or moisture‚ as this can cause electrical hazards. Use the original power cord and avoid overloading outlets. Store the projector in a cool‚ dry place when not in use. Always unplug during cleaning or maintenance.
Environmental Considerations for Longevity
To ensure your ONN projector’s longevity‚ avoid exposing it to direct sunlight‚ moisture‚ or extreme temperatures. Keep it in a cool‚ dry environment to prevent overheating and humidity damage. Regularly clean dust from vents and filters to maintain airflow. Store the projector in its original packaging when not in use to protect it from scratches and environmental stress.
Model-Specific Features and Setup
Explore unique features of ONN projector models like 4K resolution‚ HDR support‚ and Bluetooth connectivity. Refer to the manual for model-specific setup instructions and optimization tips.
Understanding Unique Features of ONN Models
Discover the unique features of ONN projector models‚ such as 4K resolution‚ HDR support‚ and Bluetooth connectivity. These models often include built-in speakers for enhanced audio and advanced adjustment options like manual keystone correction and color optimization. Higher-end models may also offer wireless connectivity and smart app integration‚ ensuring a modern and streamlined entertainment experience tailored to your preferences.
Model-Specific Setup Requirements and Tips
Setting up your ONN projector involves careful unboxing and placement on a stable surface or mounted. Connect devices via HDMI or wirelessly for convenience. Adjust keystone correction and focus for a clear image. Fine-tune color settings and brightness for optimal viewing. Refer to the manual for model-specific tips to ensure a seamless setup and enhanced performance tailored to your ONN projector model.
Advanced Features for Enhanced Experience
Leverage 4K resolution and HDR support for stunning visuals‚ and enjoy wireless convenience with Bluetooth connectivity. Built-in speakers enhance audio‚ creating an immersive entertainment experience for all users.
Leveraging 4K Resolution and HDR Support
Experience cinematic clarity with 4K resolution‚ delivering sharp‚ detailed images. HDR support enhances contrast and color range‚ providing vibrant visuals with deeper blacks and brighter whites. Ensure your source device is 4K-capable and use compatible HDMI settings to unlock these features. This combination elevates your viewing experience‚ making movies and games more immersive and visually stunning for all users.
Utilizing Bluetooth and Built-in Speakers
Enhance your entertainment experience with Bluetooth connectivity‚ enabling seamless wireless audio streaming from devices. The built-in speakers deliver high-quality sound‚ eliminating the need for external systems. Pairing devices is straightforward‚ ensuring immersive audio-visual synchronization. This feature is perfect for movies‚ gaming‚ or music‚ offering convenience and enhanced enjoyment without additional setup or equipment.

Quick Start Guide for Rapid Setup
Unbox‚ connect HDMI‚ and power on. Adjust settings like brightness and focus for clarity. Ensure proper ventilation and stable placement for optimal performance immediately.
Step-by-Step Instructions for Immediate Use
Unbox and place the projector on a stable surface. Connect the HDMI cable to your device and the projector. Turn on the projector and ensure it’s set to the correct input. Remove the lens cover and adjust focus for clarity. Use keystone correction if needed to align the image. Plug in the power cord and wait for the projector to warm up. Adjust brightness and contrast for optimal viewing. Ensure proper ventilation and stable power supply for uninterrupted use.
Essential Checks for Smooth Operation
Ensure all cables are securely connected and the power supply is stable. Verify the lens is clean and free from obstructions. Check for firmware updates to maintain optimal performance. Confirm proper ventilation to prevent overheating. Test remote control functionality and ensure batteries are fresh. Review input settings to match connected devices. Perform these checks regularly for uninterrupted and high-quality viewing experiences.
Congratulations! You’ve completed the ONN Projector Manual. Explore advanced features‚ maintain your device‚ and enjoy cinematic experiences. Refer back for troubleshooting and optimal performance tips.
Best Practices for Ongoing Use and Maintenance
Regularly clean the lens and filter to maintain image clarity. Check for firmware updates to ensure optimal performance. Handle the projector gently and avoid extreme temperatures. Store it in a dry‚ cool place when not in use. Use a soft cloth for cleaning and refer to the manual for specific care instructions to prolong its lifespan and ensure consistent quality.
Maximizing Your ONN Projector Experience
To maximize your ONN projector experience‚ explore advanced features like 4K resolution and HDR for vivid visuals. Utilize Bluetooth for wireless audio and built-in speakers for immersive sound. Adjust settings based on ambient light and content type for optimal viewing. Experiment with keystone correction and focus for a perfect image alignment. Customize your setup to suit your space and preferences for an unforgettable entertainment experience.