sod levelling guide
Summary
Learn how to level your sod like a pro! Discover expert tips, essential tools, and step-by-step instructions for a smooth, even lawn surface.
Sod levelling is a crucial process for ensuring a smooth, even surface. Proper techniques and tools are essential for professional results, enhancing the durability and aesthetics.
What is Sod Levelling?
Sod levelling is a landscaping technique used to create a uniform and even surface for laying sod or turf. It involves measuring, preparing, and adjusting the ground to ensure the sod rests smoothly and evenly. This process is essential for proper drainage, aesthetics, and long-term health of the lawn. Sod levelling typically includes clearing debris, grading the soil, and compacting it to prevent settling or shifting. Specialized tools like lawn rollers and levelling rakes are often used to achieve precision. Proper sod levelling ensures the grass establishes itself evenly, promoting healthy growth and a visually appealing lawn. It is a critical step in lawn installation and maintenance, requiring attention to detail and the right techniques.

Importance of Proper Sod Levelling
Proper sod levelling ensures a smooth, even, and aesthetically pleasing lawn surface. It prevents uneven areas where water may pool, reducing the risk of erosion and damage to the sod. A well-levelled surface promotes healthy grass growth by allowing roots to establish evenly and preventing shallow rooting. This leads to a durable and long-lasting lawn. Additionally, proper levelling enhances the overall appearance of the landscape, making it safer for recreational activities and improving property value. It also ensures proper drainage, reducing maintenance needs over time. Levelling the sod correctly is a critical step in achieving a professional-looking lawn that remains healthy and visually appealing for years.
Preparation for Sod Levelling
Preparation involves clearing debris, measuring the area, and ensuring the soil is level. Proper groundwork ensures a smooth and even sod installation process, maximizing results and longevity.

Tools and Equipment Needed

To achieve professional results, you’ll need specific tools for sod levelling. A lawn roller or hand tamper helps compact the soil, ensuring stability. A shovel or turf cutter is essential for preparing the ground, while a leveling rake smooths the surface. For precision, use a laser level or bubble level to check evenness. A wheelbarrow or turf cutter can transport sod efficiently. Additional tools like measuring tape, gardening gloves, and watering equipment are also vital. Ensure all tools are in good condition to avoid delays and uneven results. Proper equipment ensures the sod is laid correctly, promoting healthy growth and a visually appealing lawn.
Site Preparation Tips
Site preparation is crucial for successful sod levelling. Start by clearing the area of debris, rocks, and weeds to ensure a clean base. Check the drainage to prevent waterlogging, which can damage the sod. Till the soil to a depth of 8-10 inches to loosen it and improve root penetration. Remove any rocks or obstacles that could interfere with levelling. Use a rake to create a smooth surface and apply a thin layer of topsoil or compost to enrich the soil. Compact the soil using a hand tamper or roller to create a stable base, preventing settling issues after sod installation. Finally, water the soil lightly to settle it before laying the sod. Proper preparation ensures the sod adheres well and grows evenly.

Step-by-Step Sod Levelling Process
Begin by measuring the area and marking boundaries. Lay the sod rolls evenly, aligning edges carefully. Use a level tool to ensure uniformity. Smooth the surface with a rake or roller, compacting gently to eliminate air pockets and achieve a professional finish.
Measuring and Marking the Area

Accurate measurement is critical for sod levelling. Use a tape measure to determine the length and width of the area. Ensure the site is clear of debris, rocks, and obstructions. Mark the boundaries using stakes and twine to visualize the space. Check the area for levelness using a carpenter’s level or laser level. Calculate the number of sod rolls needed based on the measured area. Proper marking ensures even distribution and avoids waste. Double-check measurements to prevent mismatches or uneven surfaces. This step sets the foundation for a smooth and professional sod installation. Neglecting accurate measurements can lead to costly adjustments later. Plan carefully to achieve the desired results.
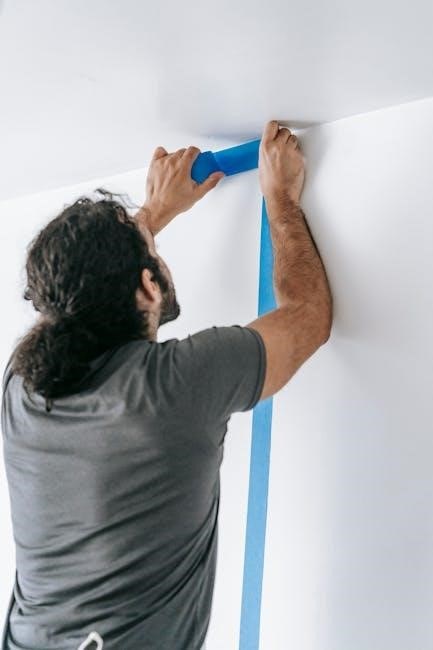
Laying the Sod

Begin by laying the sod along the longest edge of the marked area, ensuring a straight line. Use a staggered pattern for subsequent rows to avoid weak points. Align the sod rolls tightly, leaving no gaps. Cut sod rolls as needed to fit around trees, gardens, or other obstructions using a sharp utility knife or sod cutter. Smooth the surface with a rake to remove air pockets. Water the sod lightly after laying each section to keep it moist. Use a hand tamper or lawn roller to compact the sod, ensuring it adheres to the soil. Avoid walking on freshly laid sod until it has rooted. Proper laying ensures a seamless, even surface for long-term durability and aesthetic appeal.
Smoothing and Compacting the Surface
After laying the sod, use a rake to smooth the surface, removing any air pockets or wrinkles. A lawn roller or hand tamper can be used to compact the sod, ensuring it adheres evenly to the soil. Apply light water during compaction to help settle the sod. Avoid overwatering, as this can displace the sod. Compact edges near sidewalks, gardens, or other obstructions carefully to prevent unevenness. Repeat the process until the surface is firm and even. Proper compaction ensures proper drainage, prevents shifting, and promotes healthy root growth. Regularly check for any high or low spots and address them promptly for a professional finish.
Troubleshooting Common Issues
Identify and address uneven surfaces, gaps, or bubbles promptly. Use tools like rollers or hand tampers to smooth and compact the sod for a professional finish.
Dealing with Uneven Surfaces
Uneven surfaces are a common challenge in sod levelling. Start by assessing the area to identify high and low spots. Use a shovel or sod cutter to remove excess sod from elevated areas. For low spots, add soil or sand to level the ground. Compact the soil firmly using a hand tamper or roller to ensure stability. Lay the sod evenly, ensuring tight joints between pieces. If bubbles appear, cut them with a utility knife and press the sod firmly down. Regular watering and maintenance can help prevent further unevenness. Addressing these issues early ensures a smooth, professional finish and extends the lifespan of your sod.
Fixing Gaps and Bubbles
Gaps and bubbles in sod can disrupt its appearance and health. Start by inspecting the sod thoroughly. For gaps, use a utility knife to cut the sod into smaller pieces that fit snugly together. Fill small gaps with soil or sand, pressing firmly to compact. For bubbles, cut a slit in the sod above the bubble and press it down to eliminate air pockets. Water the area gently to settle the sod. Regular maintenance, including proper watering and mowing, helps prevent future gaps and bubbles. Addressing these issues promptly ensures a uniform, healthy lawn. Proper care after levelling is essential for long-term results.

Maintenance After Sod Levelling

Regular watering, proper mowing, and fertilizing are key to maintaining a healthy lawn after sod levelling. Ensure even growth and prevent damage by following a consistent care routine.

Watering and Care Tips
Proper watering is essential after sod levelling. Water the sod deeply but avoid over-saturating to prevent root rot. Maintain a schedule of 1-2 inches of water per week, adjusting for rainfall. Keep the soil consistently moist during the first few weeks to ensure root establishment. Once established, reduce watering to promote deep root growth. Mow the lawn at the recommended height for your grass type, and fertilize seasonally to maintain health. Regularly inspect for pests or diseases and address issues promptly. Aerating the soil annually can improve drainage and air circulation. By following these care tips, your sod will thrive, providing a lush, even surface for years to come.
Long-Term Maintenance Strategies
For sustained health and appearance, adopt a long-term maintenance plan. Regular mowing at the recommended height for your grass type promotes even growth. Fertilize twice annually, once in spring and once in fall, using a balanced fertilizer. Aerating the soil yearly improves drainage and root circulation. Dethatch every 2-3 years to remove dead grass and debris. Monitor for pests and weeds, addressing issues early to prevent infestations. Maintain proper drainage to avoid waterlogged areas. Replenish sod as needed for bare spots. By following these strategies, your lawn will remain lush, even, and resilient over time, ensuring lasting results from your sod levelling efforts.