boil mouthpiece instructions
Summary
Learn how to boil a mouthpiece safely and effectively. Perfect for both newbies and experienced users. Get clear, easy-to-follow instructions today!

A boil-and-bite mouthpiece is a common method for creating a custom fit. It involves softening the material in boiling water and shaping it to your teeth. Proper fitting ensures comfort, protection, and optimal performance during sports or dental use. This guide will walk you through the process step-by-step.
Understanding the Importance of Proper Fitting
Proper fitting of a boil mouthpiece is crucial for both comfort and protection. A well-fitted mouthguard ensures it stays in place during physical activity, providing optimal protection for teeth and gums. Improper fitting can lead to discomfort, reduced protection, and difficulty speaking or breathing. Additionally, a mouthpiece that doesn’t fit correctly may not distribute impact forces evenly, potentially causing injuries. Proper fitting also enhances performance in sports by allowing clear communication and unobstructed breathing. It’s essential to follow the instructions carefully to achieve a snug, custom fit that meets your specific needs. A correctly fitted mouthpiece ensures safety, functionality, and long-term durability.

Preparation Steps
Before boiling, ensure your mouthpiece is clean and free from debris. Select the correct size and shape for your mouth. Gather necessary tools like a pot, tongs, and a timer. Bring water to a boil, then carefully submerge the mouthguard. Let it soften for the recommended time before proceeding. Proper preparation ensures a smooth and effective fitting process.
Cleaning the Mouthguard Before Boiling
Properly cleaning the mouthguard before boiling is essential for hygiene and effectiveness. Start by rinsing it under cool water to remove any surface dirt or debris. Use a mild soap or dental cleaning solution to gently scrub the mouthguard, ensuring all areas are covered. Avoid using harsh chemicals or abrasive materials that could damage the material. Once cleaned, rinse thoroughly with fresh water to eliminate any soap residue. A clean mouthguard ensures a better fit and prevents bacterial growth during the boiling process. This step is crucial for maintaining the integrity and safety of the mouthguard. Always follow this cleaning routine before proceeding to boil.

Choosing the Right Size and Shape
Selecting the correct size and shape of your boil-and-bite mouthguard is vital for a proper fit. A mouthguard that is too small may not cover all your teeth, while one that is too large can cause discomfort. Measure your mouth or refer to the manufacturer’s sizing chart to ensure the best fit. Some mouthguards come in universal sizes, while others are tailored for specific dental needs. If you have braces or a unique dental structure, consider a model designed for such cases. Additionally, check the thickness of the mouthguard, as thicker options provide greater protection but may feel bulkier. Choosing the right size and shape ensures optimal comfort and protection during use. Always follow the manufacturer’s guidelines for sizing recommendations.
Boiling Water Preparation
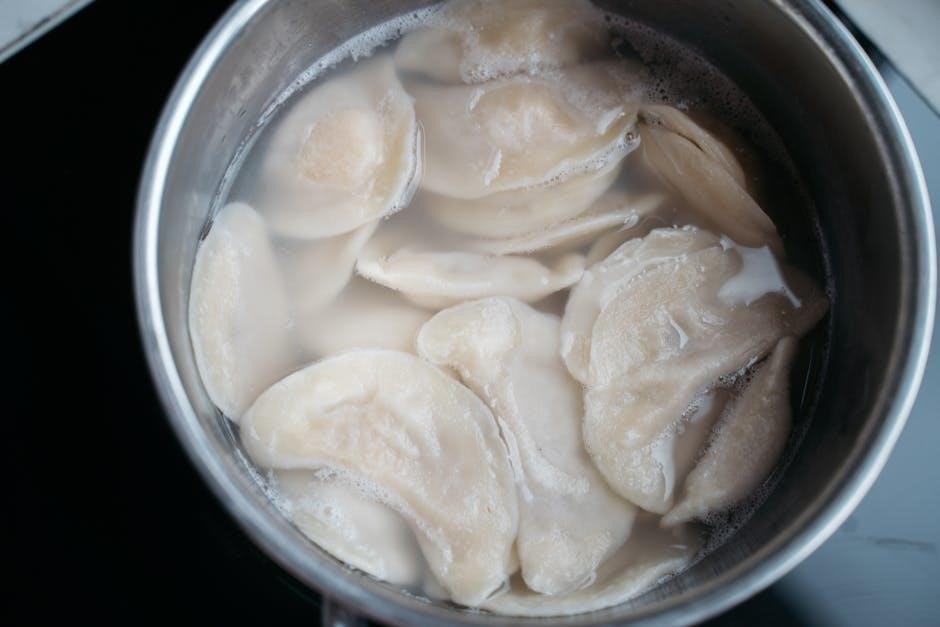
Properly preparing boiling water is essential for softening the mouthguard material. Fill a pot with enough water to fully submerge the mouthguard. Place the pot on a stove and bring the water to a rolling boil. Ensure the water reaches the correct temperature, typically around 200°F, to soften the material without overheating it. Avoid using a microwave as it can create uneven heating. Once boiling, remove the pot from the heat source and let it stand for about 30 seconds to prevent excessive heat when submerging the mouthguard. This step ensures the material is pliable enough to mold but not damaged by extreme temperatures. Always use tongs or a slotted spoon to handle the mouthguard during this process. Proper water preparation is crucial for achieving the best results.
The Boiling Process
The boiling process involves submerging the mouthguard in boiling water to soften the material for a custom fit. Proper water preparation and timing are crucial to avoid overheating.
Submerging the Mouthguard in Boiling Water
Submerging the mouthguard in boiling water is a critical step to soften the material for molding. Fill a pot with enough water to fully cover the mouthguard and bring it to a boil. Use tongs or a slotted spoon to carefully place the mouthguard into the boiling water, ensuring it is completely submerged. Allow it to soak for 30-60 seconds, depending on the thickness of the material. Avoid overheating, as this can damage the mouthguard. Once softened, remove it from the water with the same utensils and proceed to the cooling and molding phase. Proper submersion ensures an even softening process, which is essential for achieving a precise fit.
Recommended Boiling Time and Temperature
The recommended boiling time for a mouthguard is typically between 30 to 60 seconds, depending on the model and thickness. Water should reach a full boil, usually at 100°C (212°F), before submerging the mouthguard. It’s crucial not to exceed the suggested time, as overheating can cause the material to become too soft or even damaged. After boiling, let the mouthguard cool slightly to avoid burns before placing it in the mouth. Proper temperature control ensures the mouthguard softens just enough for shaping without losing its structural integrity. Always refer to the manufacturer’s instructions for specific guidelines, as variations may exist between different products.
Cooling and Molding
After boiling, allow the mouthguard to cool slightly to avoid burns. Then, place it in your mouth and bite down gently to shape it perfectly around your teeth.
Allowing the Mouthguard to Cool
After boiling, remove the mouthguard from the water with tongs or a slotted spoon and let it cool for about 30 seconds to 1 minute. This brief cooling period ensures the mouthguard is pliable but not too hot, preventing burns or discomfort when placed in the mouth. Proper cooling is essential to maintain the structure and integrity of the material, ensuring it can be molded accurately without damage. Once slightly cooled, the mouthguard is ready for the molding process, where it will be shaped to fit your teeth perfectly. This step is crucial for a comfortable and secure fit.
Placing the Mouthguard in the Mouth and Biting Down
Once the mouthguard has cooled slightly, carefully place it into your mouth, ensuring it covers all your teeth. Gently bite down to press the softened material against your teeth and gums. Apply consistent pressure to mold the mouthguard to your dental structure. Hold this position for a few seconds to allow the material to conform to your bite. Proper alignment and firm pressure ensure a snug, customized fit. This step is critical for achieving maximum protection and comfort during use. After molding, allow the mouthguard to set before removing it to ensure the shape holds. This process ensures a secure fit tailored to your mouth.

Post-Fitting Care
After fitting, rinse the mouthguard with cold water to remove excess heat. Store it in a protective case when not in use to prevent damage or deformation. Regular cleaning with mild soap and water is essential to maintain hygiene. Avoid exposure to extreme temperatures to preserve its shape and structure. Proper care ensures longevity and optimal performance of your boil-and-bite mouthguard.
Shaping and Adjusting the Mouthguard
After boiling, carefully place the softened mouthguard into your mouth, ensuring it covers all teeth evenly. Gently bite down to create an impression of your dental structure. Hold this position for about 30 seconds until it cools slightly. Remove and inspect the fit; if necessary, repeat the process for better shaping. Use scissors to trim excess material, but avoid cutting too close to the gum line. For optimal comfort, ensure the edges are smooth and even. Proper shaping ensures a snug fit, offering maximum protection and comfort during use. Regular adjustments may be needed to maintain the perfect fit.
Proper Storage and Maintenance
After fitting, store your mouthguard in a clean, dry case to prevent distortion and contamination. Avoid exposing it to extreme temperatures, as this may alter its shape. Rinse the mouthguard with cold water after each use and allow it to air dry. Regularly inspect for signs of wear, such as thinning or cracks, and replace it if damaged. Do not share your mouthguard, as this can lead to improper fit and hygiene issues. For optimal longevity, clean it periodically with mild soap and water. Replace the mouthguard every 1-2 years or sooner if it no longer fits comfortably. Proper care ensures durability and effectiveness in protecting your teeth and mouth.