knife sharpening angle guide for whetstone
Summary
Learn the ideal angles for sharpening knives with our expert guide. Master the perfect edge every time!
Knife sharpening is an essential skill for maintaining blade efficiency, with the sharpening angle being a critical factor․ This guide focuses on mastering the angle using a whetstone, a traditional yet effective tool for achieving razor-sharp edges․ By understanding and applying the correct techniques, you can ensure your knives remain sharp and durable, enhancing both safety and performance in the kitchen or workshop․
1․1 Importance of Sharpening Angle
The sharpening angle is critical for achieving a sharp, durable edge․ It determines how effectively the blade is honed and maintained․ Proper angles enhance sharpness and edge retention, while incorrect ones can damage the knife or lead to a dull edge quickly․ Maintaining the correct angle ensures optimal results when using a whetstone, preserving the knife’s integrity and longevity․ This fundamental aspect is key to successful sharpening, preventing unnecessary wear and ensuring the blade remains sharp and reliable over time․
1․2 Brief History of Whetstone Sharpening
Whetstone sharpening dates back to ancient times, with early civilizations using natural stones to hone tools and weapons․ The technique evolved through the Middle Ages, becoming a refined craft․ By the 18th century, whetstones were widely used for sharpening knives and other blades․ Despite modern alternatives, whetstones remain popular for their precision and ability to preserve a knife’s original edge․ Their timeless effectiveness has made them a staple in both professional and home sharpening practices, ensuring sharp, durable blades for generations․
1․3 Benefits of Using a Whetstone
Using a whetstone offers numerous advantages for knife sharpening․ It provides precise control over the sharpening angle, ensuring a razor-sharp edge․ Whetstones are gentle on blades, preserving the knife’s original edge and extending its lifespan․ They are cost-effective and require no electricity, making them eco-friendly․ Regular use improves sharpening skills and allows for customization of edge sharpness․ Additionally, whetstones are versatile, suitable for various knife types, and promote sustainability by reducing waste․ This method is favored by professionals and home cooks alike for its effectiveness and longevity․

Understanding the Sharpening Angle
The sharpening angle is crucial for achieving a razor-sharp edge․ It determines how effectively the blade is honed and directly impacts both sharpness and durability․ Consistency is key․
2․1 What is the Sharpening Angle?
The sharpening angle refers to the angle at which the knife blade meets the whetstone during sharpening․ It is a critical factor in achieving a sharp, durable edge․ Typically, this angle ranges between 15° and 30°, depending on the knife type and intended use․ For example, straight-edge razors often use a narrower angle (15°-17°), while axes or machetes require a wider angle (30°-40°)․ Maintaining consistency in the angle ensures uniform sharpening and prevents damage to the blade․ Proper technique and understanding of the angle are essential for optimal results․
2․2 Optimal Angles for Different Knife Types
The optimal sharpening angle varies depending on the knife’s intended use․ Chef knives and straight-edge razors typically use a narrower angle (15°-20°) for precision and sharpness․ Pocket knives and utility knives often use a medium angle (20°-25°) for balance between edge retention and ease of sharpening․ Heavy-duty knives, like cleavers or axes, require a wider angle (30°-40°) for durability and strength․ Maintaining the correct angle ensures the knife performs optimally for its specific task, whether cutting delicate foods or chopping tough materials․ Consistency in angle is key to achieving the desired edge․
2․3 How Angle Affects Sharpness and Durability
The sharpening angle significantly impacts both the sharpness and durability of a knife․ A narrower angle produces a sharper edge, ideal for precise cutting, but may compromise durability․ Wider angles create a stronger, more durable edge, suitable for heavy-duty tasks․ Finding the right balance ensures the knife performs optimally for its intended use․ Proper angle maintenance prevents excessive wear and extends the blade’s lifespan, making it essential to tailor the angle to the knife’s specific function and user needs for the best results․
Choosing the Right Whetstone
Selecting the right whetstone is crucial for effective sharpening․ Water stones and ceramic stones are popular choices, offering precision and durability․ Grit progression ensures proper sharpening stages․
3․1 Types of Whetstones
Whetstones come in various types, each offering unique benefits․ Water stones, known for their soft abrasive layers, are highly effective and popular among sharpening enthusiasts․ Ceramic stones, more durable and requiring less maintenance, are ideal for consistent results․ Arkansas stones, made from natural novaculite, are renowned for their hardness and ability to achieve a razor-sharp edge․ Understanding the differences helps in selecting the best stone for specific sharpening needs, ensuring optimal performance and longevity of your knives․
3․2 Grit Progression for Sharpening
Grit progression is a fundamental step in sharpening, involving the use of multiple stones with increasing grit levels․ Coarse grits (e․g․, 1000) remove metal efficiently, establishing the edge shape․ Medium grits (4000-6000) refine the edge, reducing scratches․ Fine grits (8000+) polish the blade, creating a razor-sharp finish․ Progressing systematically ensures a sharp, durable edge․ Starting with lower grits and moving to higher ones is essential for optimal results, as skipping stages can leave the blade uneven or less sharp․
3․3 Preparing the Whetstone
Properly preparing your whetstone is crucial for effective sharpening․ For water stones, soak them in water for 10-15 minutes before use to ensure optimal cutting performance․ Oil stones require lubrication with sharpening oil to prevent clogging and reduce friction․ Always clean the stone thoroughly before and after use to remove metal particles and maintain its efficiency․ A well-prepared whetstone ensures a smooth sharpening process and helps achieve the desired edge quality for your knives․
Step-by-Step Sharpening Guide
Position the knife at the desired angle, stroke the blade across the whetstone, maintain consistent pressure, and repeat on both sides until sharpness is achieved․
4․1 Setting Up Your Workspace
Setting up your workspace is crucial for effective knife sharpening․ Begin by placing the whetstone on a stable, flat surface․ Secure it with a non-slip mat or damp cloth to prevent movement․ Ensure proper lighting to clearly see the blade’s edge․ Wear protective gloves and eyewear for safety․ Position the knife at the desired angle, with the bevel facing the stone․ Keep a clean, dry cloth nearby to wipe away metal particles․ For water stones, soak the stone in water for 10-15 minutes before use․ A well-prepared workspace ensures precision and safety during the sharpening process․
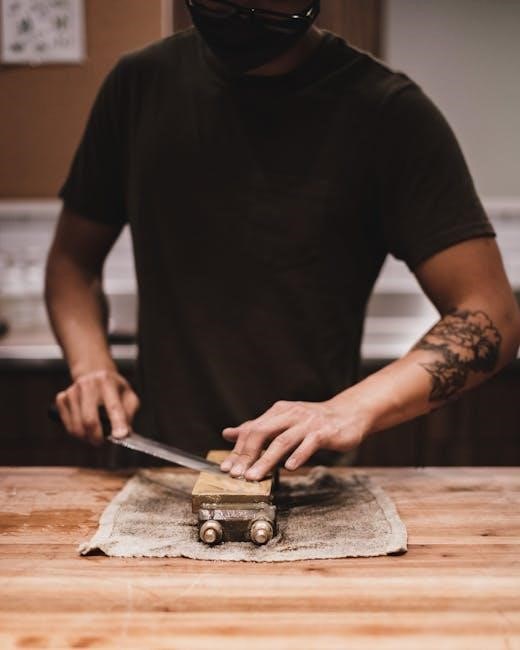
4․2 The Sharpening Process
Place the knife on the whetstone at the desired angle, with the bevel flat against the surface․ Gently draw the blade across the stone from heel to tip, maintaining consistent pressure․ Alternate sides with each stroke to ensure even sharpening․ After several passes, inspect the edge for sharpness by slicing through paper or examining it under light․ Repeat until the desired sharpness is achieved․ Finish by honing the blade with a steel to align the edge and remove any micro-serrations, ensuring a polished and durable finish․
4․3 Finishing Touches
After sharpening, use a honing steel to polish the edge, removing any micro-serrations․ Clean the knife thoroughly and dry it to prevent rust․ For optimal results, store the knife in a protective sheath or on a magnetic strip․ Finally, inspect the blade under bright light to ensure even sharpness․ For extra polish, lightly stroke the edge on a leather strop․ These steps ensure a razor-sharp, well-maintained knife, ready for precise cutting and long-lasting performance in the kitchen or workshop․

Maintaining Your Knife After Sharpening
Regular honing maintains the edge, while cleaning prevents rust and bacteria․ Store knives in a dry place, using a sheath or magnetic strip to protect the blade․
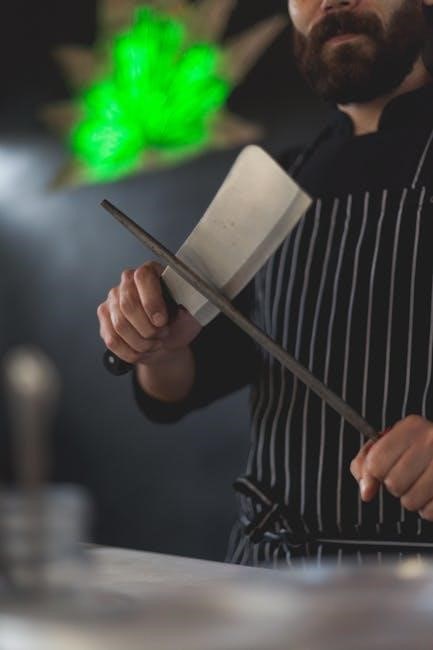
5․1 Honing the Blade
Honing the blade is essential for maintaining its sharpness after sharpening․ Use a honing steel or ceramic rod to gently realign the knife’s micro-teeth without removing metal․ Hold the knife at the same angle used during sharpening and draw it across the steel in light, even strokes․ Repeat this process 2-3 times on each side of the blade․ Honing should be done regularly, ideally after each use, to prevent the edge from dulling․ This simple maintenance step ensures your knife stays sharp and performs optimally for a longer period․
5․2 Cleaning the Knife
Cleaning the knife is crucial after sharpening to remove metal particles and residue․ Use mild soap and warm water to wipe the blade, paying attention to the edge․ Avoid harsh chemicals, as they may damage the finish․ Dry the knife thoroughly with a soft cloth to prevent rust․ Regular cleaning maintains hygiene and preserves the knife’s condition․ For added care, use a clean, dry cloth to wipe down the blade and handle after each use․ Proper cleaning ensures optimal performance and longevity of your knife․
5․3 Storage Tips
Proper storage is essential to maintain your knife’s sharpness and prevent damage․ Store knives in a dry place, away from direct sunlight, to avoid rust․ Use a protective sheath or case to safeguard the blade․ For multiple knives, consider a storage block or magnetic strip to keep them organized and separated․ Avoid stacking knives, as this can cause scratching or dulling․ Regularly inspect storage areas for moisture and ensure the knife is completely dry before storing․ Proper storage extends the life of your knife and keeps it ready for use․

Advanced Sharpening Techniques
Mastering advanced sharpening involves precision and practice․ Techniques like micro-beveling and edge refinement enhance sharpness and durability․ Experiment with various strokes and angles to achieve optimal results consistently․
6․1 Sharpening Different Blade Types
Different knife blades require tailored sharpening techniques․ Chef knives benefit from a 20-degree angle for precision cutting, while serrated knives need gentle strokes to maintain their edge․ Hunting knives, with thicker blades, often use a 25-30 degree angle for durability․ Each blade type demands specific care to optimize its performance․ Using a whetstone allows for precise angle control, ensuring the perfect sharpness for every knife․ Experiment with angles and strokes to master sharpening diverse blade types effectively․
6․2 Common Mistakes to Avoid
Common mistakes in knife sharpening include using the wrong angle, applying too much pressure, and inconsistent strokes․ Over-sharpening can damage the blade, while under-sharpening leaves it dull․ Forgetting to prepare the whetstone or using the wrong grit progression also hinders results․ Additionally, neglecting to hone the knife after sharpening can lead to a less durable edge․ Avoiding these errors ensures a sharper, longer-lasting blade․ Proper technique and patience are key to achieving professional-level sharpness with a whetstone․
6․3 Tips for Consistent Results
For consistent knife sharpening results, maintain the correct angle throughout the process and use a marker to track progress․ Practice on inexpensive knives to refine your technique․ Always soak the whetstone as recommended to ensure proper sharpening․ Apply light, consistent pressure and rinse the knife frequently to check sharpness․ Store the blade in a dry place after sharpening to prevent rust․ Regular practice and attention to detail will help you achieve razor-sharp edges consistently, making your knives more durable and reliable for various tasks․